Creating WebTest in Visual Studio Team System 2008
We can create Test Project using Visual Studio Team System 2008 in that we can add different type of Tests like Web Test, Load test, Unit Test etc.
What is WebTest?
WebTest comprises a series of HTTPRequest. We can see the response which comes from the server and we can use different extraction rules to grab hold of any information from the referrer response that we may need to pass in to the next request. WebTest offers a kind of test with which we can capture/record the HTTP/HTTPS traffic of our website or web server which communicates on HTTP Protocol.
How to Record a WebTest?
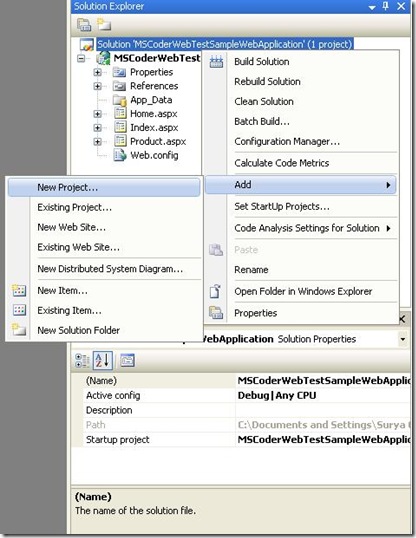
First of all we have to create a new Test Project or add a Test Project to Existing Web Application.
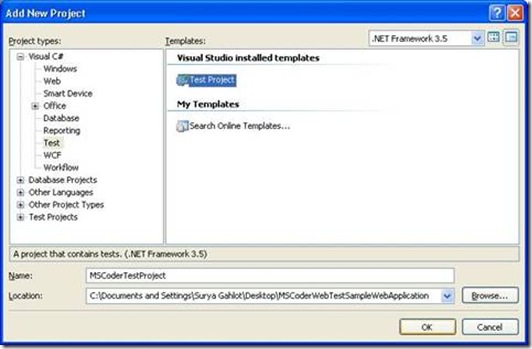
Click New Project
Click OK to add the project in the solution.
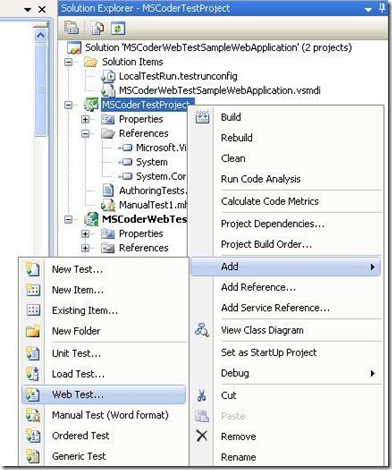
Adding Web Test to the Test Project – Right click on the Test Project and then Add –> Web Test
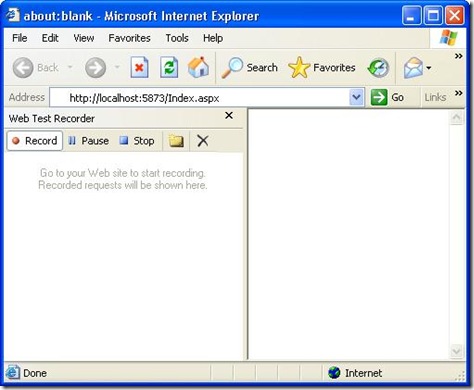
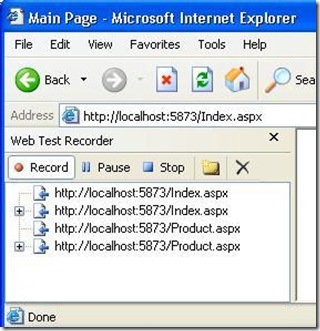
Once we click on Web Test menu, Internet Explorer will open with additional tool (Web Test Recorder).
Enter the website address and press Go. It will start recording the test.
Start navigating the site.
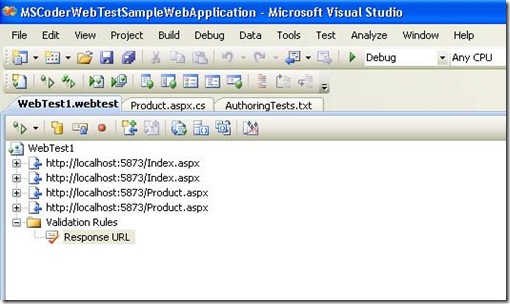
Some entries will get added while navigating to the site. Once the navigation is over click on Stop button to stop the recording.
Now Web Test has been recorded. We can enhance the Test by doing parameterization, by adding validation rules etc.
Now we will Test the Web Application using different User ID and Passwords
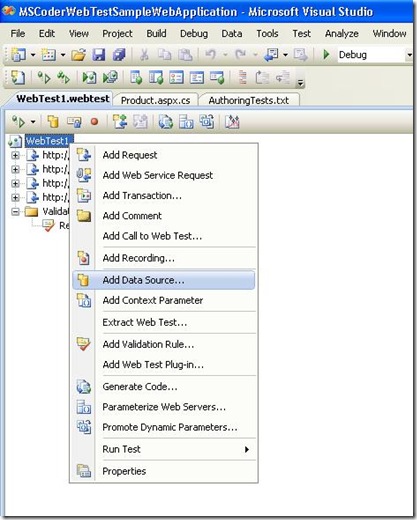
Add the Data Source –> Right Click on WebTest –> Select Add Data Source
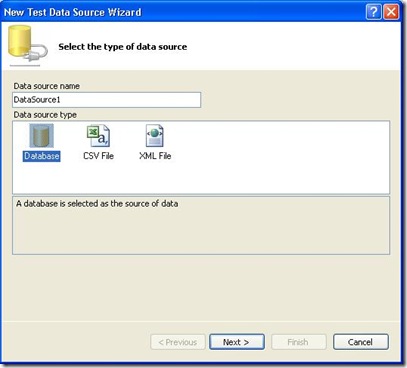
We have three options to set the Data Source Database, CSV File, and XML File.
We can select any Data source based on data availability.
Here we are going to select Database.
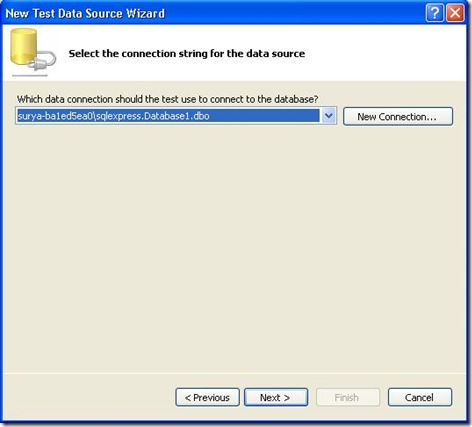
Create new connection by click on New Connection button or Select the Connection from the Combo box if the Connection is already configured in the Project.
Click Next …
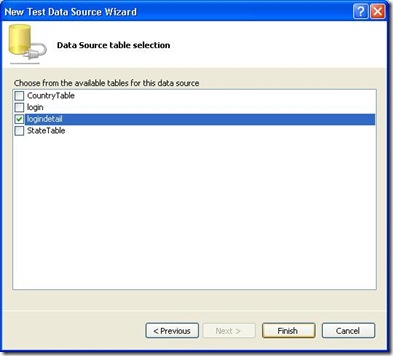
Select the login table and Click Finish.
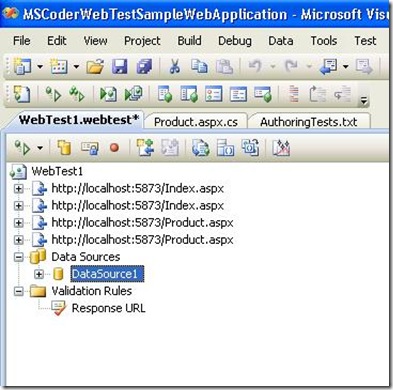
Database will get added in the Test.
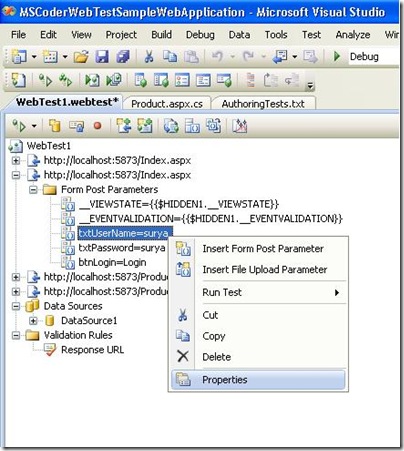
Here can we assign the Dynamic value(which will come from the database) to the control by selecting Properties.
Select the control (eg. txtUserName) Right Click on it –> Select Properties
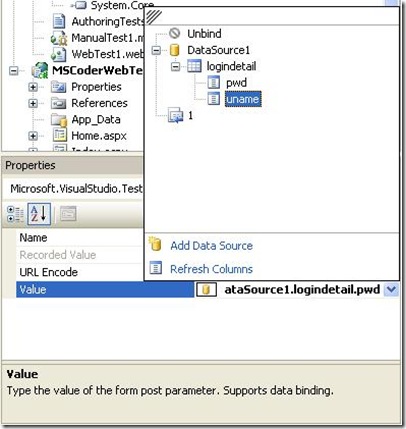
In properties – Select Value –> Click on the arrow –> Expand DataSource1 –> Expand logindetail table –> select Uname column since we are binding txtUserName textbox with uname column of the database.
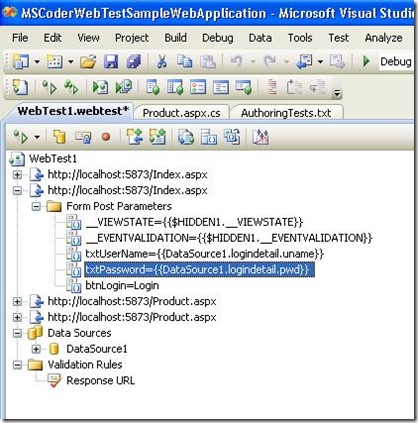
Same procedure to be followed for the txtPassword also.
After setting the value the fields they will look this.
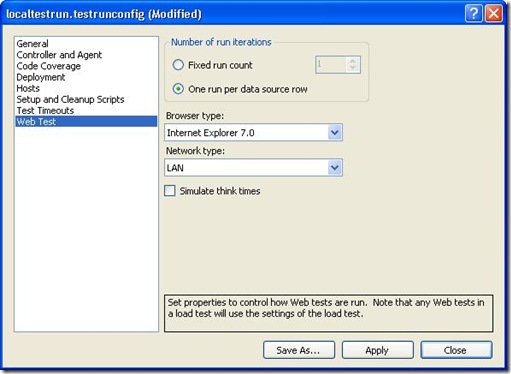
Since we have configured the database to run the tests as many times as records are available in the login table. By default the test will be running once. We have to change the setting to change Number of run iterations.
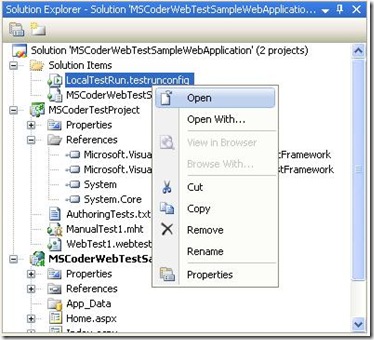
To change the iterations setting we have to select the Properties of the LocalTestRun.testrunconfig file which will be available in the Solution Explorer.
Select Web Test from the List box available in the left side, Click on One run per data source row option of the Number of run iterations group box. Click Apply –> then Close.
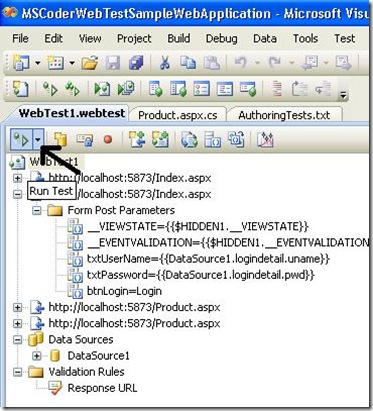
Now we can start running the Test by click the Run Icon available in the toolbar.
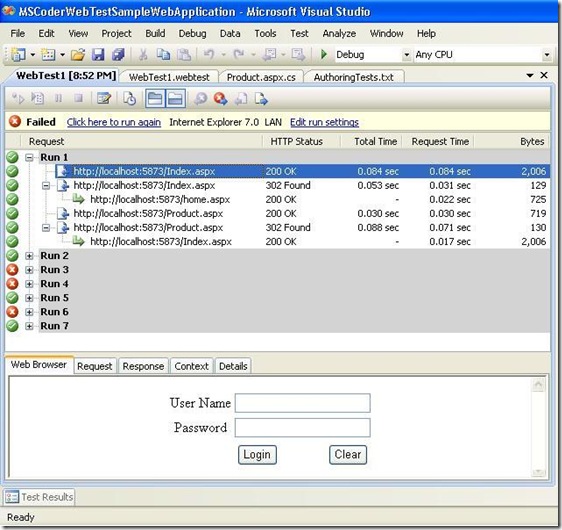
In logindetail table we have total 7 records so total 7 times test has been iterated.
Run 3, Run 4, and Run 6 have failed because the logindetail table is having wrong username or password for these records.
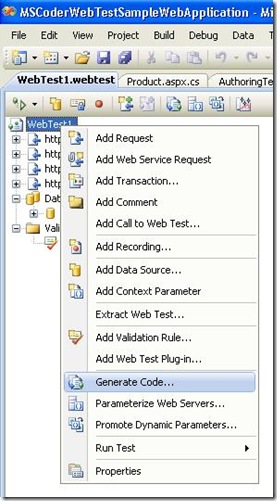
Now we its time to generate the code for the same WebTest by right clicking on the WebTest1 –> Click on Generate Code..
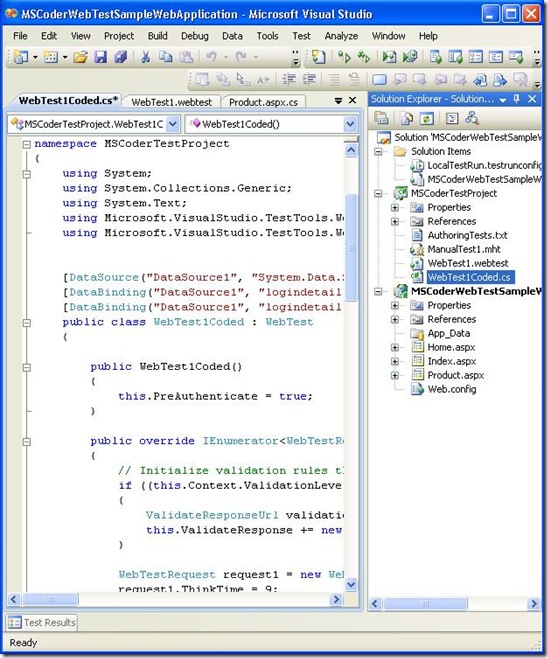
Once the Generate Code is clicked WebTestCoded.cs file will get added in the Project. We can manipulate the code for enhancing the Test.
Link to Download the Code.
